Modelador gráfico
Introducción
The graphical modeler allows to create complex models using a simple and easytouse interface. When working with a GIS, most analysis operations are not isolated, but part of a chain of operations instead. Using the graphical modeler, that chain of processes can be wrapped into a single process, so it is easier and more convenient to execute than single process later on a different set on inputs. No matter how many steps and different algorithms it involves, a model is executed as a single algorithm, thus saving time and effort, specially for larger models.
The modeler has a working canvas where the structure of the model and the workflow it represents are shown. On the left part of the window, a panel with two tabs can be used to add new elements to the model.
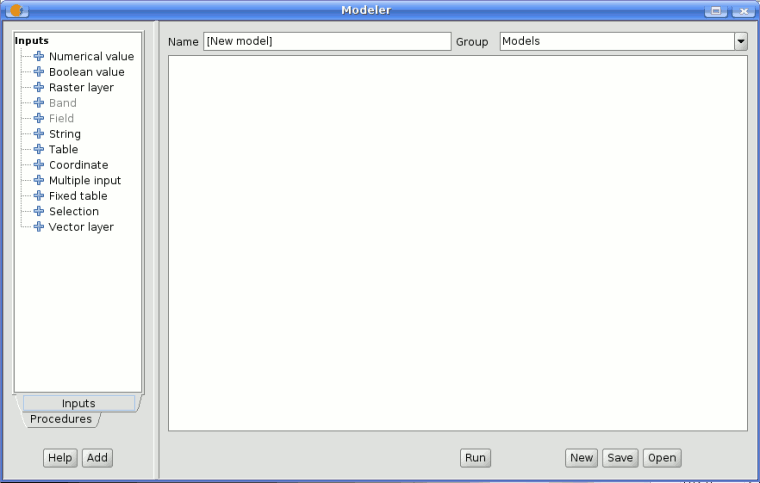
SEXTANTE modeler window
Creating a model is a two-step process.
- Definition of necessary inputs. These inputs will be added to the parameters window, so the user can set their values when executing the model. The model itself is a SEXTANTE algorithm, so the parameters window is generated automatically as it happens with all the algorithms included in the library.
- Definition of the workflow. Using the input data of the model, the workflow is defined adding algorithms and selecting how they use those inputs or the outputs generated by other algorithms already in the model.
Definición de entradas
The first step to create a model is to define the inputs it needs. The following elements are found in the Inputs tabs on the left side of the modeler window:
- Band
- Raster layer
- Vector layer
- String
- Table field
- Coordinate (Point)
- Table
- Fixed table
- Multiple input
- Selection
- Numerical value
- Boolean value
Double-clicking on any of them, a dialog is shown to define its characteristics. Depending on the parameter itself, the dialog will contain just one basic element (the description, which is what the user will see when executing the model) or more of them. For instance, when adding a numerical value, as can be seen in the next figure, apart from the description of the parameter is needed to set a default value, the type of numerical value and a range of valid values.
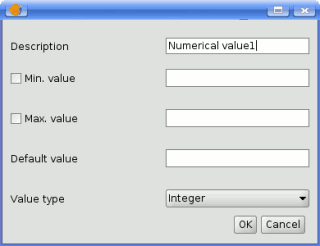
SEXTANTE modeler window for adding values
For each added input, a new element is added to the modeler canvas.
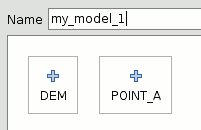
SEXTANTE modeler elements
Definición de procesos
Once the inputs have been defined, it is time to define the algorithms to apply on them. Algorithms can be found in the Processes tab, grouped much in the same way as they are in the toolbox.
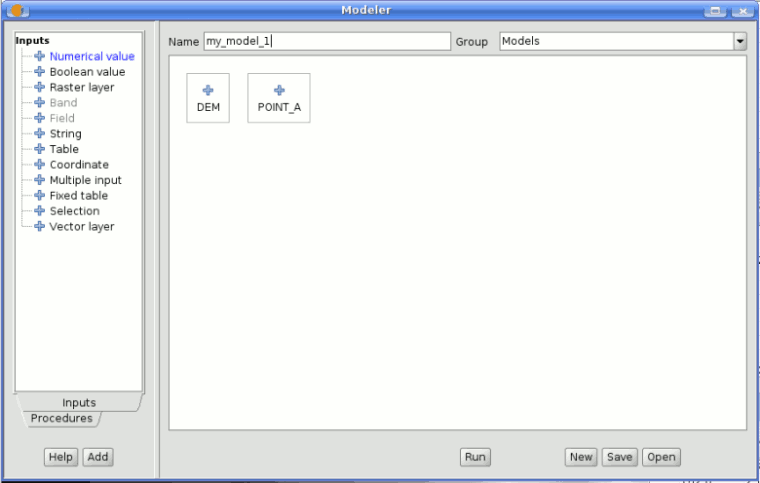
SEXTANTE modeler
To add a process, double-click on its name. An execution dialog will appear, with a content similar to the one found execution panel that SEXTANTE shows when executing the algorithm from the toolbox.
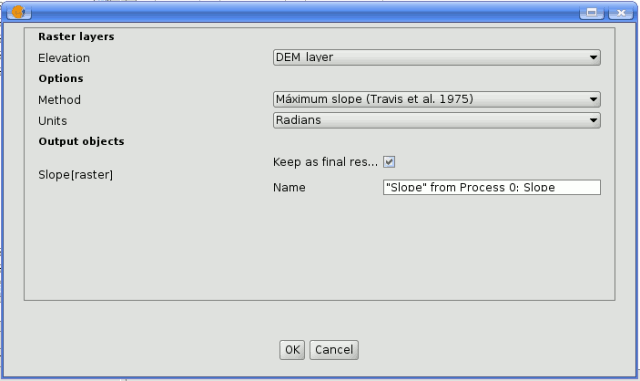
SEXTANTE modeler process
Some differences exist, however, the main one being the absence of a raster ouput tab, even if the selected algorithm generates raster layers as output.
Instead of the textbox that was used to set the filepath for output layers and tables, a checkbox and a text box are found. If the layer generated by the algorithm is just a temporary result that will be used as the input of another algorithm and should not be kept as a final result, the check box should be left unchecked. Checking it means that the result is a final one, and you have to supply also a valid description for the output, which will be the one the user will see when executing the model.
Selecting the value of each parameter is also a bit different, since there are important differences between the context of the modeler and the toolbox one. Let's see how to introduce the values for each type of parameter.
- Layers (raster and vector) and tables. They are selected from a list, but in this case the possible values are not the layers or tables currently loaded in the GIS, but the list of model input or the corresponding type, or other layers or tables generated by algorithms already added to the model.
- Numerical values. Literal values can be introduced directly on the textbox. This textbox is a list that can be used to select any of the numerical value input of the model. In this case, the parameter will take the value introduced by the user when executing the model.
- String. Like in the case of numerical values, literal strings can be typed, or an input string can be selected
- Points. Coordinates cannot be directly introduced. Use the list to select one of the coordinate inputs of the model
- Bands. The number of bands of the parent layer cannot be known at designtime, so it is not possible to show the list of available bands. Instead, a list with band numbers from 1 to 250, as well as the band parameters of the model, is shown. At runtime, SEXTANTE will check if the parent raster layer selected by the user has enough bands and the given band has therefore a valid value, and if not it will generate an error message.
- Table field. Like in the previous case, the elds of the parent table or layer cannot be known at designtime, since they depend of the selection of the user each time the model is executed. To set the value for this parameter, type the name of a field directly in the textbox, or use the list to select a table field input already added to the model. The validity of the selected field will be checked by SEXTANTE at runtime
- Selection. The list contains in this case not only the available option from the algorithm, but also the selection inputs already added to the current model
Once all the parameter have been assigned valid values, click on OK and the algorithm will be added to the canvas. It will be linked to all the other elements in the canvas, whether algorithms or inputs, which provide objects that are used as inputs for that algorithm.

SEXTANTE model
Edición del modelo sobre el lienzo
Once the model has been designed, it can be executed clicking on the Run button. The execution window will have a parameters tab automatically created based on the requirements of the model (the inputs added to it), just like it happens when a simple algorithm is executed. If any of the algorithms of the model generates raster layers, the Raster output tab will be added to the window.
Elements can be dragged to a different position within the canvas, to change the way the module structure is displayed and make it more clear and intuitive. Links between elements are update automatically.
To change the parameters of any of the algorithms of a model, doubleclick on it to access its parameters window.
To delete an element, right-click on it and select Delete. Only those elements that do not have any other one depending on them can be deleted. If you try to delete an element that cannot be deleted, SEXTANTE will show a warning message.
Almacenamiento y recuperación de modelos
Models can be saved to be executed or edited at a later time. Use the Save button to save the current model and the Open model to open any model previously saved. Model are saved in an XML file with the .model extension.
Models saved on the models folder will appear in the toolbox algorithm tree in a group named Models.
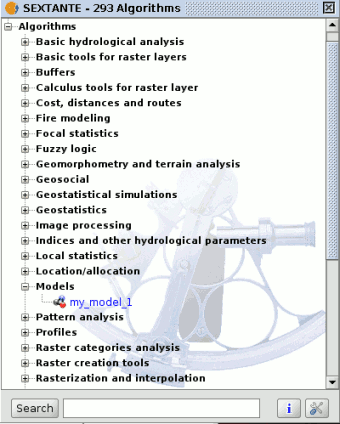
SEXTANTE models on the tree
When the toolbox is invoked, SEXTANTE searches the models folder for files with .model extension and loads the models they contain. Since a model is itself a SEXTANTE algorithm, it can be added to the toolbox just like any other algorithm.
The models folder can be set from the SEXTANTE toolbox, clicking the configuration button at the right lower corner of the window, and then introducing the path to the folder in the corresponding field.
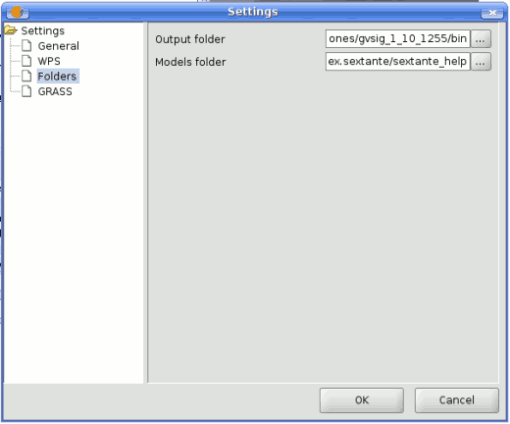
SEXTANTE modeler configuration
Models loaded from the models folder appear not only in the toolbox, but also in the algorithms tree in the Processes tab of the modeler window. That means that you can incorporate a model as a part of a bigger model, just as you add any other algorithm.